Build a Quadcopter Drone with a Self-leveling Camera Gimbal
There are essentially two configurations for a quadcopter: the “+” frame and the “X” frame. Here we’ve chosen to build an “X” frame so your onboard camera can have a clear forward view.
We’ll take you all the way from building the airframe to adding autonomous flight capability with ArduPilot. Once you’ve got it working, you could program this drone, for instance, to automatically visit a series of landmarks or other waypoints and take pictures of them.
Wiring Diagram:
Step #1: Fabricate the body
Step #2: Cut and drill the booms
Step #3: Assemble the frame
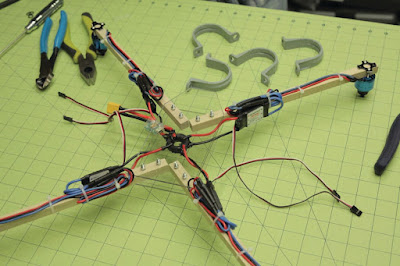
Step #4: Wire the power hub
Step #5: Drill motor shaft clearances
Step #6: Mount the motors
Step #7: Add the landing gear
Step #8: Install the shock mounts
Step #9: Build the camera/ battery mount
Step #10: Mount the camera and battery
Step #11: Install the avionics
Step #12: Install the gimbal controller
Step #13: Configure the software
CONCLUSION:
Don’t expect your quad to fly perfectly the first time. You’ll likely need to make some tweaks and adjustments before it flies well. If you’ve never flown a quad before, remember to work the controls gently, as most beginners tend to over-steer. Your first goal should be to hover about 24" off the ground for 1-2 seconds and then immediately land. Once you can do that consistently, try to take off, rise above the “ground effect” zone (3'-4’), and then land gently. Work your way up gradually to longer and higher flights.
It is likely that you will crash at some point, especially if this is your first multirotor. Keep a positive attitude, pay attention, and try to learn something every time. Crashing, learning, repairing, and improving your skills and your machine is part of the fun and challenge of the hobby.


